Install printer
- Download this file
- Locate the file on your computer (it will typically be found in Downloads)
- Right click the file and click Run as administrator
- PS! In some cases your antivirus program will report this file as a virus. It is not a virus, and to be able to install the printer you will have to temporary deactivate your antivirus program.
- Click on Select a shared printer by name
- Paste the address using CTRL + V and click Next (the program has already copied the link)
- Type in your username@usn.no and your password and click OK
- Click Next and Finnish
You can now print from your own PC.
Rememer to activate your USN-card before printing.
If you want black and white printing
- Search for Printers and Scanners in the start menu
- Right-click the printer in question, then Printing Preferences.
- In the Basic Settings tab, see the bottom where it says Color Mode, change this to Black and White
Staple sheets
- Search for Printers and Scanners in the start menu
- Right-click on the printer in question, then Printer properties.
- Select the Device Settings tab
- Click Change at the top right
- In the new window that appears; select Select Manually, then select iR-ADV
- The settings you then see must reflect this (if not change the settings manually):

7. One the settings have changed, you can open the application you want to print from. Then choose Print and Printer Properties
8. Then you cange to Staple + Collate under Staple/Collate/Group(H)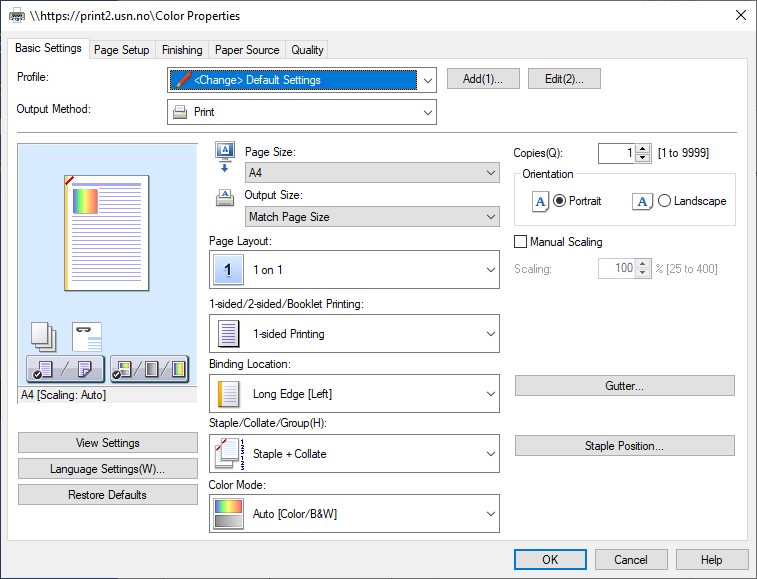
Change which user to print from
To change which user to print from, you can do the following
1. Search for Credential Manager in the Windows search box, and click on the application
2. Click Windows Credentials
3. Find *Session under Windows Credentials. Then press Edit to change user.
4. Fill in studentnumber@usn.no og your password, then hit Save